Image Editor is a lightweight but powerful and easy-to-use application included in the DAEMON Tools Pro package. Image Editor allows you to edit image files, create new virtual images, burn them to discs and save to your collection.
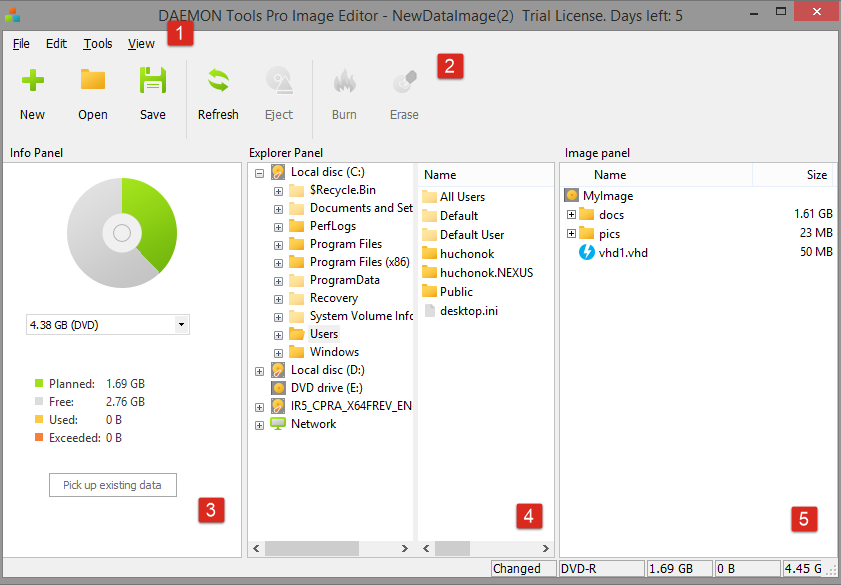
The main window of Image Editor includes:
-
Main menu that provides access to the main features of the application
-
Toolbar that consists of the most frequently used and must-have features
-
Info Panel that shows the information about the inserted physical disc or an image you are making or editing
-
Explorer Panel that allows you to find data on the hard disk right from the application and add it to your project easily
-
Image Panel that shows the content of an image or disc you are burning or making/editing
Main Menu & Toolbar
The main menu of Image Editor includes File, Edit, Tools and View sub-menus.
Using File sub-menu, you can start a new project with data or audio tracks, save the project, open the previously saved one or import data from the already existing image. With Edit sun-menu, you can work with the current project: add new files, remove or rename them, etc. Tools sub-menu allows you to burn the project or erase the inserted physical disc. And finally, View sub-menu allows you to hide or show the Toolbar, Info Panel or Explorer Panel.
The icons from the Toolbar are devoted to the most used features to work with the opened project or to start the new one.
Info Panel
Info Panel shows the physical disc inserted to the device or a virtual disc for the new image. To switch between a physical or a virtual disc, use the combo box under the picture of a disc. Note that burning features are active only when the physical disc is chosen.
Image Panel
Image Panel is all about the current project. The panel itself and the files shown here have the following contextual menu:
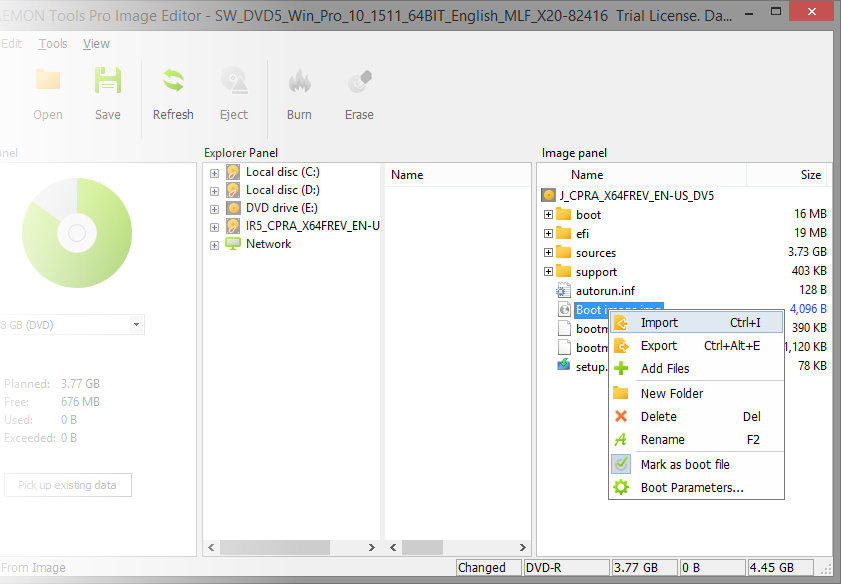
- Import option is used to include all files from the existing image to the project
- Export option lets you save all the files from the project as a folder on the hard disk
- Add Files option allows you to find and include more data to the project
- New Folder option creates a directory inside the project
- Delete and Rename options remove or change the names of the chosen files
- Mark as boot file option is used for the bootable discs or images. If there is a bootable file in the project, then you will be able to adjust additional Boot parameters:
- Type of emulation option has several alternatives. Choose No Emulation option if you want the bootable image to be loaded into memory. If you mount an image with Floppy Emulation type, special virtual A: drive will be created for it. Note that the size of bootable files needs to be smaller than the size of virtual floppy. If you choose Hard Drive Emulation option, virtual C: drive will be created for your image.
- Load segment of sector option defines the initial segment. 7C0 is a traditional segment that is equal to zero.
- Number of loaded sectors is a quantity of virtual sectors that will be saved to Load Segment during the boot process.