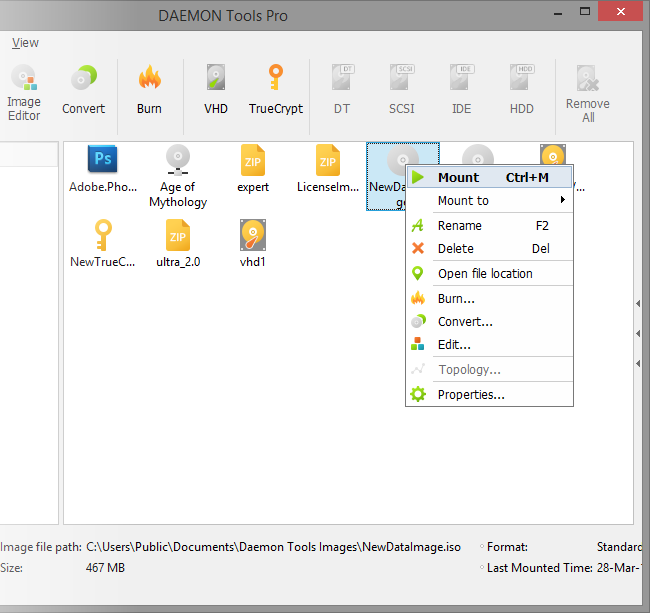
Since DAEMON Tools Pro 6, you can mount any image without the necessity to create a virtual drive. Just find needed image on the hard disk or on Images tab, double-click on it or choose Mount option from its contextual menu.

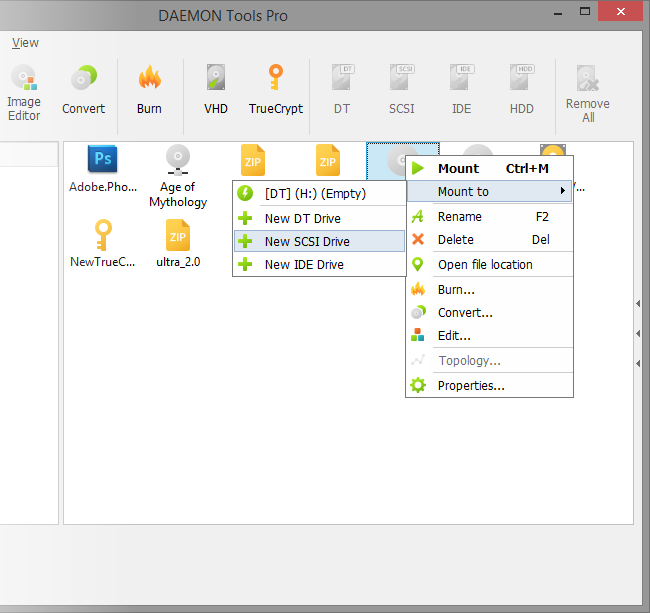
Also, you can choose the drive which is already created or the one which will be created while mounting. To select a virtual drive, go to Images tab, open the contextual menu of a certain image, choose Mount to option and select the drive you need.

The third method is available in all versions of DAEMON Tools Pro:

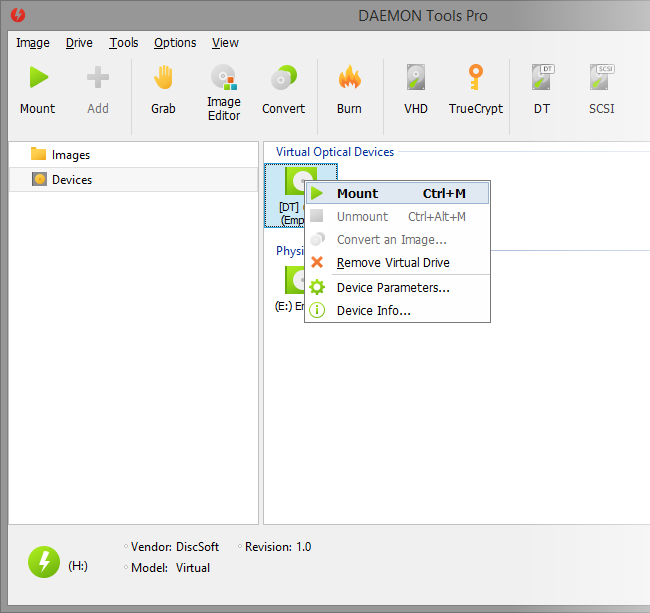
- Open Devices tab.
- Go to the contextual menu of the chosen drive and click Mount option here.
- Find an image on the hard disk and click Open button.
Here are several other ways to mount an image.
Mounting from DAEMON Tools Pro main window
- Select a virtual drive, open Image menu and select Mount option here.
- Select a virtual drive and use Ctrl+M shortcut.
- Select a virtual drive and click Mount option o nthe toolbar.
- Start dragging an image file icon on the Images tab — virtual devices will appear while dragging, drop the image to the virtual device you need.
Mounting from Explorer
- Find an image file you want to mount. Choose Mount to submenu from its contextual menu and select a new or existing drive.
- Double-click an image to mount. Note that you should integrate the certain file types in Preferences first.
- Create a virtual drive in DAEMON Tools Pro and then find it in the system. Select Mount Image... option from its contextual menu.
In addition, you can mount using DAEMON Tools Pro Agent and DAEMON Tools Pro Gadget.